Showing posts with label milk. Show all posts

Sunday, January 5, 2014

The Cronut

 photo IMG_1168copy.jpg

 photo IMG_1121.jpg

 photo IMG_1197.jpg

 photo Cronut_1.jpg

 photo IMG_1148.jpg

 photo IMG_1231.jpg
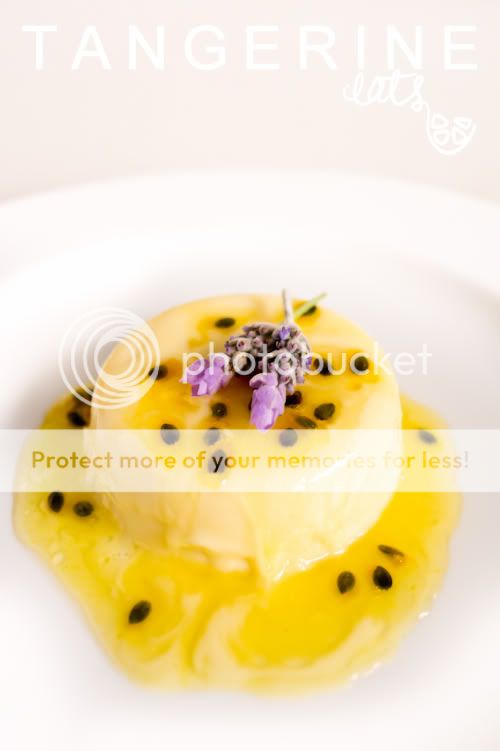
Ah, the mythical cronut - part croissant, part donut, all noms. Tales of its sweet delights travelled to us one night on the television when Dominique Ansel was on Late Night with Jimmy Fallon to cook his beautiful creation. I haven't had the New York City cronut but I found a recipe for an imitation version by Edd Kimber.

These babies are an absolute treat - flaky, buttery and scrumptiously fluffy. To make these, you'll need a bit of patience and a lot of kitchen counter space. But once you cut out your little cronut discs and lower them into the oil to fulfill their delicious destiny, you'll know it was all worth it.

Ingredients
60ml milk
65ml warm water
6g dried yeast
150g cold diced butter
250g plain flour (The recipe calls for 125g plain flour and 125g strong flour. I couldn't find strong flour so I used all plain flour and added bread improver.)
5g bread improver
30g caster sugar
½ teaspoon salt
vanilla sugar
icing sugar
milk
vanilla extract

1. Combine milk, water and yeast in a bowl.
2. Pulse the cold butter, flour and bread improver in a food processor until it looks like lumpy breadcrumbs.
3. Combine the flour mixture, the wet mixture and the caster sugar and salt until form into a dough. Cover with cling wrap and fridge for 2 hours.
4. Roll the dough into a rectangle about 1cm thick. Fold the dough into thirds, turn and roll again. Repeat this 2 times. I found the dough to be quite sticky at the beginning of the rolling but by the time I folded it a few times, it became a nice, smooth dough.
5. Cover dough with cling wrap and fridge for at least 4 hours or overnight.
6. Roll out the dough to about ½cm thick and cut out your cronut discs with cookie cutters. Put the discs on a tray lined with baking paper, cover with a tea towel and let prove for 1 hour.
7. Fry cronuts in oil at 170ºC until puffed up and golden.
8. Drain on paper towels and toss in vanilla sugar.
9. Make glaze by mixing icing sugar, vanilla extract to taste and a splash of milk. Drizzle on cooled cronuts.

Wednesday, May 16, 2012

Croquembouche

SAM_3402
SAM_3394
SAM_3376
SAM_3361
SAM_3371
SAM_3400
Custard-filled and white chocolate coated profiteroles on a chocolate iced sponge base

This was my first attempt at making profiteroles, which made the croquembouche idea even more ambitious. I'm so psyched that it all worked because every step was a labour of love for my boyfriend's birthday. I made the profiteroles using Raymond Blanc's recipes for choux pastry and creme patissiere here.

1. Make a cake base of your choice.
2. Make the pastries, dip them in melted white chocolate, fill with creme patissiere and stick them on the cake base with toffee.
3. Decorate with toffee strands (using a spoon, cool toffee down enough for it to make long, thin strands, then drizzle around the croquembouche).

Sunday, October 23, 2011

Macadamia & Vanilla Poached Meringue

Light, fluffy meringues poached in a vanilla and macadamia infused milk, served with macadamia and strawberry jam
You'll need:

2 eggs
100g castor sugar
400ml milk
15 raw macadamia nuts
1 teaspoon vanilla extract
Strawberry jam to serve

Ground 10 macadamia nuts until it's a rough meal.

Combine milk, macadamia meal and vanilla in a small saucepan. Bring to the boil and remove from heat. Infuse for half an hour and strain.

Beat egg whites until medium peaks form.

Slowly add the sugar. Beat until stiff and glossy.

Place strained milk back into the saucepan and bring to a simmer.

Spoon dollops of the meringue into the milk. Turn when the meringues expand. (You'll inevitably get milk skins on the meringues but you get remove them later.)

Remove and drain on paper towels. (Wipe off any bits of milk skin.)

Serve with finely chopped macadamia and strawberry jam. Check out my strawberry jam recipe here.

Enjoy!

Thursday, October 6, 2011

Lavender Panna Cotta


There's a lavender bush in a small lane near my place and it gives off the loveliest scent. Even though I felt a little bit naughty about it, I had to bring some home. I've always wanted to make a lavender-infused dessert so I decided to make lavender and honey panna cotta with passionfruit syrup.


This recipe is adapted from Hugh Fearnley-Whittingstall's elderflower vanilla panna cotta recipe on River Cottage Every Day. (Incidentally, HFW makes me want to move to the country, grow my own vegetables and raise a family of lambs.)


So creamy and florally...


You'll need:

100ml milk
250ml double cream
30g castor sugar
1 tablespoon honey
1 teaspoon vanilla extract
Some lavender heads (I used 8)
2 teaspoons gelatine powder
150ml natural yoghurt

Place milk, cream, sugar, honey, vanilla and lavender in a small saucepan over low heat. Remove from heat as soon as it bubbles. Leave to infuse for half an hour.

Strain through a sieve and place back into saucepan. Warm over low heat.

Mix gelatine in with a third of the mixture. Stir into the whole mixture. Cool completely.

Stir in yoghurt.

Pour into 4 moulds. I used ramekins, lightly greased with vegetable oil.

Set in fridge for at least 2 hours.

When you're ready to serve, dip each mould into hot water for 10 seconds and then flip out onto a plate.

Drizzle with passionfruit syrup (combine 1 passionfruit, ¼ cup sugar and 1 tablespoon water in a saucepan over low heat and simmer for a few minutes).


Enjoy!

Wednesday, July 7, 2010

Thyme Pancakes

I believe that after this life, there is a pancake cloud where people eat Canadian style pancakes every morning and then sleep on pillowy pancake pockets every night. In this life, starting the day off with pancakes and bacon is a blessing. I've also been blessed with a few lazy days lately, which is when food ideas come to me.

I like my pancakes light and fluffy. I like a thick batter (lumps don't bother me, Gary and George!) and lots of butter. Fresh garlic and thyme, crispy bacon, garlic mayo and a bit of maple syrup makes this the ultimate savoury pancake breakfast.

1 cup plain flour
2 tablespoons sugar
Pinch of salt
1 egg
¾-1 cup milk (depending on how much the flour absorbs)
2 tablespoons butter, melted
Fresh sprigs of thyme
Garlic cloves, halved
1 tablespoon mayonnaise
Maple syrup

Place dry ingredients in a bowl and make a well in the centre.

Add egg and whisk flour in from the sides.

Gradually add milk, then butter, while whisking.

Heat pan over medium heat. You want the butter to sizzle (so the pancake doesn't just soak up the butter) but not burn, so lower the heat after the first pancake.

Melt a tiny knob of butter in the centre and lay down a sprig or two of thyme.

Spoon pancake batter over the butter and thyme and spread out with the back of the spoon. Turn over when bubbles form on top or when the edges are brown.

Remove from heat and gently rub the cut side of a garlic clove on the pancake.

Repeat! (This recipe will make 5 pancakes.)

If you love your garlic like I do, crush half a clove of garlic and mix with the mayo. If you don't like the strong hit of garlic, fry it gently in the butter before mixing with the mayo.

Serve with crispy bacon and maple syrup.

The mayo is really rich so the maple syrup provides the perfect balance to each bite (I really, really enjoy sweet and savoury in the same dish). I'm also obsessed with fresh thyme right now - so aromatic and so pretty in the pancakes. This is the kind of meal that warms up my winter days.

Friday, April 23, 2010

Gooey Rocky Road Soufflé

I'll let you in on a secret: when it's late at night and there's no one else on the road, I will more than likely drive over roundabouts. Of course, I also avoid my boyfriend's glares and then sheepishly explain, "I don't like moving my arms." I'm not an inactive person, I'm actually quite athletic. It's just that at the end of a long day of driving - granted curves and bends are fun - my arms are tired and roundabouts are just too much.

Likewise, some things like rocky road involve too much chewing. It tastes great, don't get me wrong, but after 3 bites my mouth is just in mastication overkill. This is why I decided to make a gooey rocky road: the same great taste but with 95% less chewing required.

To a chocolate soufflé, I added pink marshmallows, white chocolate bits and macadamia shortbread. The white chocolate and marshmallow melt into the soufflé and you end up with a rich, intensely chocolatey soufflé with gooby bits on top. The macadamia shortbread is dense and crumbly and it all just melts in your mouth. This is exactly the kind of lazy eating that's needed for a long weekend.

Gooey Rocky Road Soufflé
Adapted from Gordon Ramsay's Chocolate Soufflé recipe

Unsalted butter for greasing, softened
6 squares dark chocolate, finely grated
20g cornflour
200ml milk
200g dark chocolate (at least 70% cocoa solids), chopped
80g egg yolks
200g egg whites
150g castor sugar
Pink marshmallows
White chocolate bits
Macadamia shortbread

Preheat oven to 180°C.

Grease the sides of 8 small ramekins with butter in upward strokes. Refrigerate for 5 minutes and grease again. Sprinkle grated chocolate on the sides evenly.

In a small saucepan, combine cornflour with a bit of milk and create a smooth paste. Gradually mix in rest of milk. Bring to the boil on low heat, whisking continuously. When the mixture thickens after around 30 seconds, add chocolate and whisk until the chocolate is melted. Remove from heat and whisk egg yolks in. Cool in a large bowl.

Beat egg whites with an electric beater. When medium peaks form, gradually add castor sugar. Beat until thick and glossy.

Carefully fold egg whites into chocolate mixture, one third at a time, until just combined.

Pour into ramekins and level off with the back of a knife.

Bake for 10-12 minutes, or until the soufflés have risen well past the rims of the ramekins.

Serve immediately with marshmallows, white chocolate bits and crumbled macadamia shortbread.
Photobucket

Sunday, March 7, 2010

Olive Bread

Who doesn't love a beautiful, warm piece of fresh bread? If you've ever made your own bread, or have bought bread from Brasserie Bread, you'd know that store-bought sliced bread does not come close at all to a fresh loaf made with love. This olive bread with potato slices and fresh rosemary on top is a taste sensation. A crispy potato crust, melt-in-your-mouth soft and fluffy bread on the inside, pieces of olive and the aroma of roasted rosemary... DELICIOUS!

Adapted from the olive bread recipe on Taste.com.au

2¼ cups plain flour
2 teaspoons dried yeast
2 teaspoons castor sugar
1 teaspoon sea salt
1 cup warm water
1 cup pitted kalamata olives, dried and roughly chopped
2 teaspoons milk
1 small potato
Fresh rosemary leaves, roughly chopped
Melted butter for brushing

Sift flour into a large bowl. Combine with yeast, sugar and salt. Make a well in the centre and add water. Mix well until dough forms and knead on a floured surface for 10 minutes. Kneading not only helps the bread rise, it's my favourite part of the process. Show it a bit of love, get to know your food.

Place dough in a lightly oiled bowl. Cover with a damp cloth and place in a warm place for one hour.

Preheat oven to 170°C.

Punch the dough with your fist to get rid of excess air.

Place on a flat and floured surface. Knead olives in. The juices from the olives may come out and separate the dough slightly, that's okay. This is what makes the lovely pull-apart bits inside the bread.

Roll into a flat oval and place on a greased baking tray.

Brush lightly with milk to create a crust.

Wash and peel the potato. Slice the potato thinly with a vegetable peeler. Place the ribbons of potato on top of the dough. Brush with butter and sprinkle with rosemary.

Bake for 40 minutes.

Rest for 5 minutes before serving.


I love how rustic this feels with my homemade bread on a chopping board my boyfriend made himself.

Fantastic with butter (butter, not margarine!), dipped in olive oil and freshly-cracked pepper or toasted with grilled gorgonzola and prosciutto. Enjoy!

Wednesday, February 17, 2010

Ridiculously Rich Chocolate Cake

I received this set of Simple Essentials cookbooks by Donna Hay for my birthday last year (thanks Barb!). When every recipe in this chocolate edition is absolutely drool-worthy, there's only one thing to do: combine 3 of them to create a monster of a cake! With almost one kilo of chocolate and half a kilo of butter in it, this is by far the most indulgent cake I've ever had.

Chocolate mud cake

375g butter, softened
1⅓ cups brown sugar
3 eggs
2 cups plain flour
½ teaspoon baking powder
⅔ cup cocoa powder, double sifted
200g melted dark chocolate
¾ cup milk

Preheat oven to 160°C. Cream the butter and sugar with an electric beater for 8-10 minutes, or until the mixture is light and creamy. Gradually add eggs and beat well. Sift flour, baking powder and cocoa powder, then fold into the butter and sugar. Fold melted chocolate in. Spoon mixture into a 22cm round cake tin (I used one with a removable base), lined with baking paper. Bake for 1¼ hours. Cool in tin.

Wrap the cake in plastic and place in freezer for at least 2 hours. Using a bread knife, level off the top of the cake. Turn upside down so the base is the top. Cut the cake in half, horizontally.

Chocolate mousse filling

2 teaspoons powdered gelatine
2 tablespoons water
200g dark chocolate, chopped
75g butter
2 tablespoons cocoa powder, sifted
4 eggs, separated
1 cup single or pouring cream
3 tablespoons icing sugar, sifted

Place water and gelatine in a bowl. Set aside for 5 minutes. Melt chocolate, butter and cocoa in a saucepan over low heat until smooth. Remove from heat and stir in gelatine mixture until dissolved. Pour mixture into a bowl. Add egg yolks gradually, beating well. Set aside. Whisk the cream with electric beater until soft peaks form. Set aside. Whisk egg whites with electric beater until soft peaks form. Gradually add icing sugar. Whisk until thick and glossy. Gently fold egg white mixture with chocolate mixture. Fold the whipped cream through.

Place bottom layer of chocolate mud cake back in the round cake tin. Pour chocolate mousse filling on top. Wrap up top layer with plastic again. Fridge for 2 hours. Remove from cake tin (this is where the removable base comes in handy) and put top layer on. Set aside in fridge.

Chocolate truffles

400g dark chocolate, chopped
¾ cup single or pouring cream
Cocoa powder, sifted

Melt chocolate and cream over low heat until smooth. Pour mixture into a 15x18cm dish lined with baking paper. Fridge for 2-3 hours. Roll tablespoons of mixture into balls. Dust with cocoa powder. Fridge for another hour.

For a nice touch, decorate the top of the cake with chocolate truffles around the edge. If you're not serving it immediately, I suggest serving the chocolate truffles on each plate as they will melt if left out of the fridge for too long.

Chocolate mud cake, chocolate mousse filling and chocolate truffles recipes from Simple Essentials: Chocolate by Donna Hay.

Enjoy!

Sunday, January 31, 2010

Rice Pudding with Honey and Cinnamon Roasted Fig


Recipe adapted from Sweet Food, published by Murdoch Books.
Rice pudding
20g unsalted butter
3 tablespoons Arborio rice
3 eggs
¼ cup castor sugar
1¾ milk
½ cup cream
1 teaspoon vanilla extract
Cinnamon and nutmeg for sprinkling
Preheat oven to 160°C.
Grease an ovenproof dish with butter.
Cook the rice in a saucepan of boiling water for 12 minutes or until tender. Drain well.
Beat eggs lightly in a bowl.
Add sugar, milk, cream and vanilla essence and combine well. Stir in rice.
Make a bain-marie in a deep roasting tin by pouring in enough hot water to cover half the greased ovenproof dish.
Pour mixture into the ovenproof dish. Sprinkle a light layer of cinnamon and nutmeg on top.
Bake for 45 minutes or until golden brown and a skewer comes out clean.
Rest for 5 minutes out of the water before serving.
Honey and cinnamon roasted fig
2 tablespoons honey
1 cinnamon quill
4 fresh figs, quartered
½ teaspoon vanilla essence
⅓ cup water
Preheat oven grill to moderately hot.
Place honey, cinnamon, vanilla essence and water in a small saucepan. Bring to the boil and then simmer gently for 6 minutes.
Place figs on a shallow baking dish.
Pour honey mixture over figs and grill until the fig juices just start to come out.
Enjoy!